|
WebRadioApp
0.1
|
|
WebRadioApp
0.1
|
This guide is designed to be used with STM32H747I-DISCO board.Development in this case was carried out in the STM32CubeIDE provided by ST, but this framework can be used in any type of development environment. This is not a guide about how to use the STMCubeIDE. If you are interested in how to use this in more depth, please go to its documentation.
In this guide we are going to create an IPv6 HTTPS server.
First of all, we are going to begin with a simple project and then will add more complexity along the way. Let's create a simple UDP sender as starting point. Once you have installed the STM32CubeIDE, click on New > STM32 Project and a window similar to this will appear:
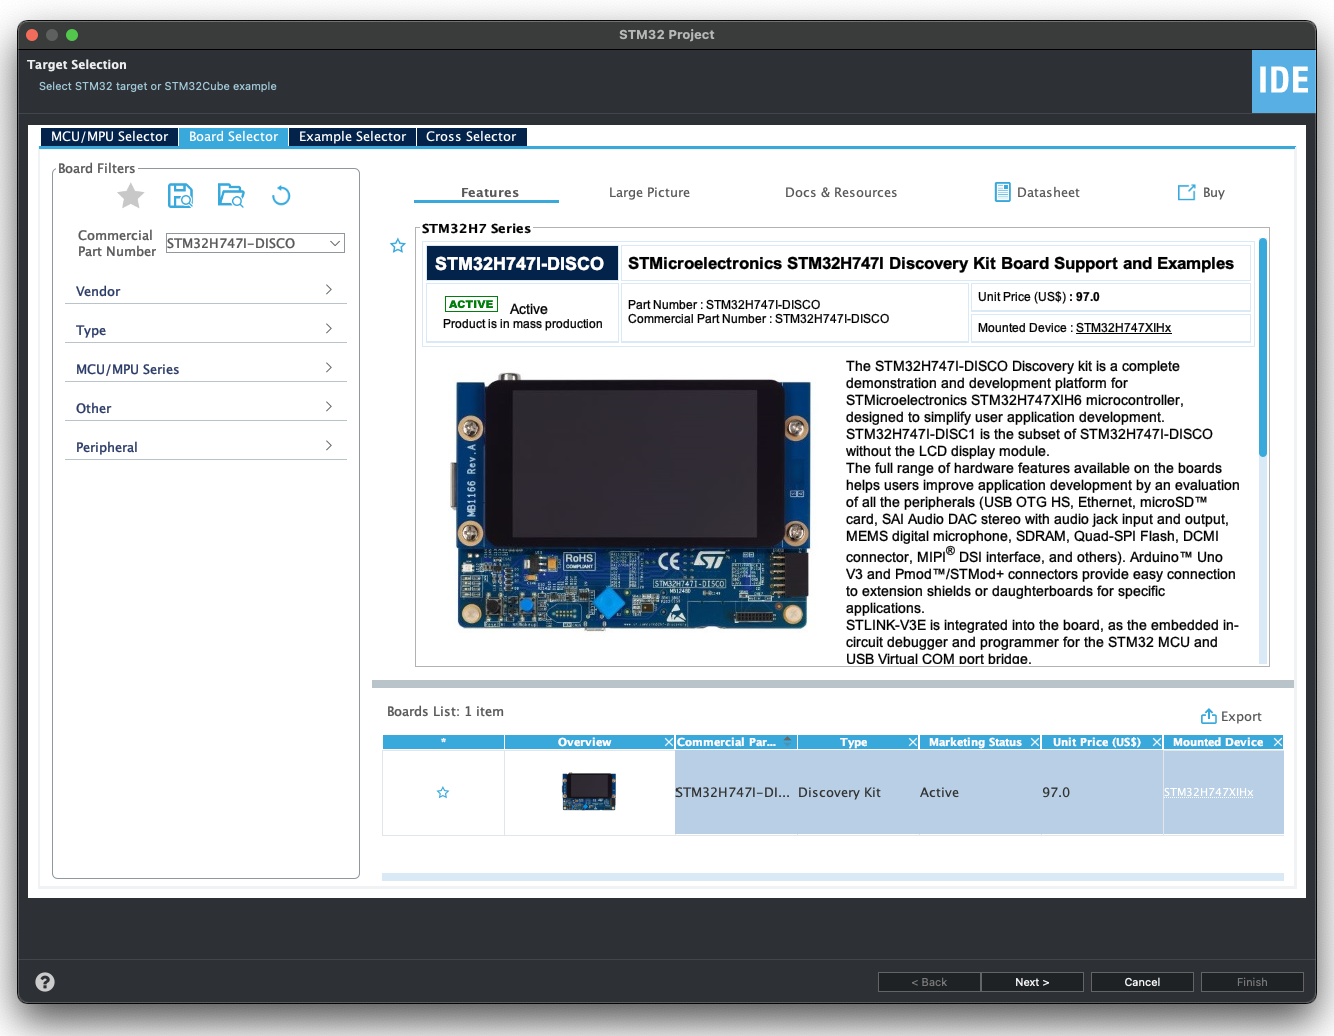
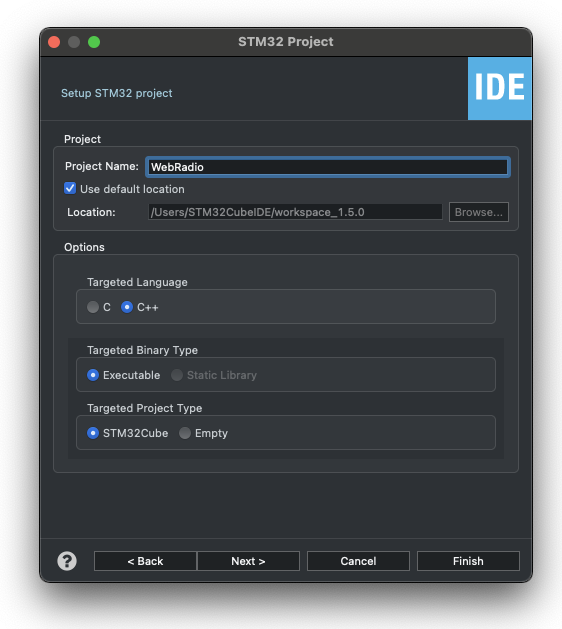
Then select the STM32H747I-DISCO board and create a project in your workspace selecting C++ (you can also use C if you want).
If everything goes well, then you will have something like this:
Next, we need to configure the Ethernet peripheral anc the LwIP middleware and also make some physical modifications in the board.
There are a couple of adjustment that must be made to the STM32H747I-DISCO for successful compilation and execution of the framework.
If we look closer at the documentation, we find information about the ethernet peripheral in section 5.7:
The STM32H747I-DISCO board supports 10 Mbps / 100 Mbps Ethernet communication with the U18 LAN8742A-CZ-TR PHY from MICROCHIP and CN7 integrated RJ45 connector. The Ethernet PHY is connected to the STM32H747XIH6 MCU via the RMII interface.The 25 MHz clock for the PHY is generated by oscillator X2. The 50 MHz clock for the STM32H747XIH6 is provided by the RMII_REF_CLK of the PHY.With the default setting, the Ethernet feature is not working because of a conflict between ETH_MDC and SAI4_D1 of the MEMs digital microphone. *Table 5 shows the possible settings of all solder bridges or resistor associated with the Ethernet on the board.*
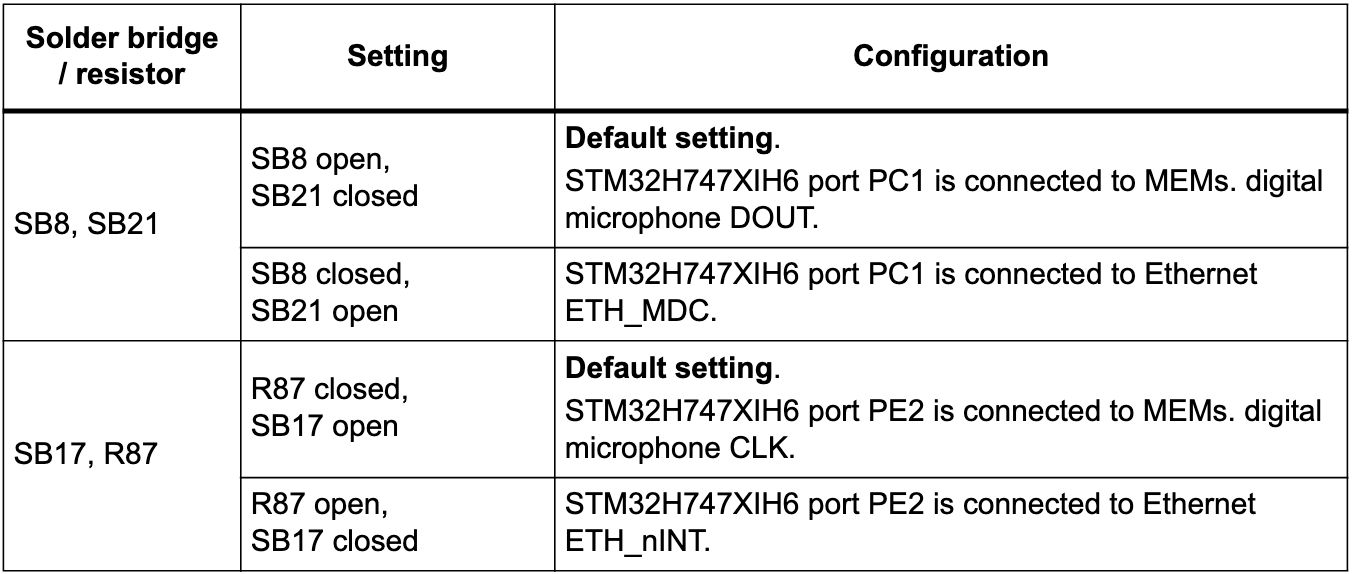
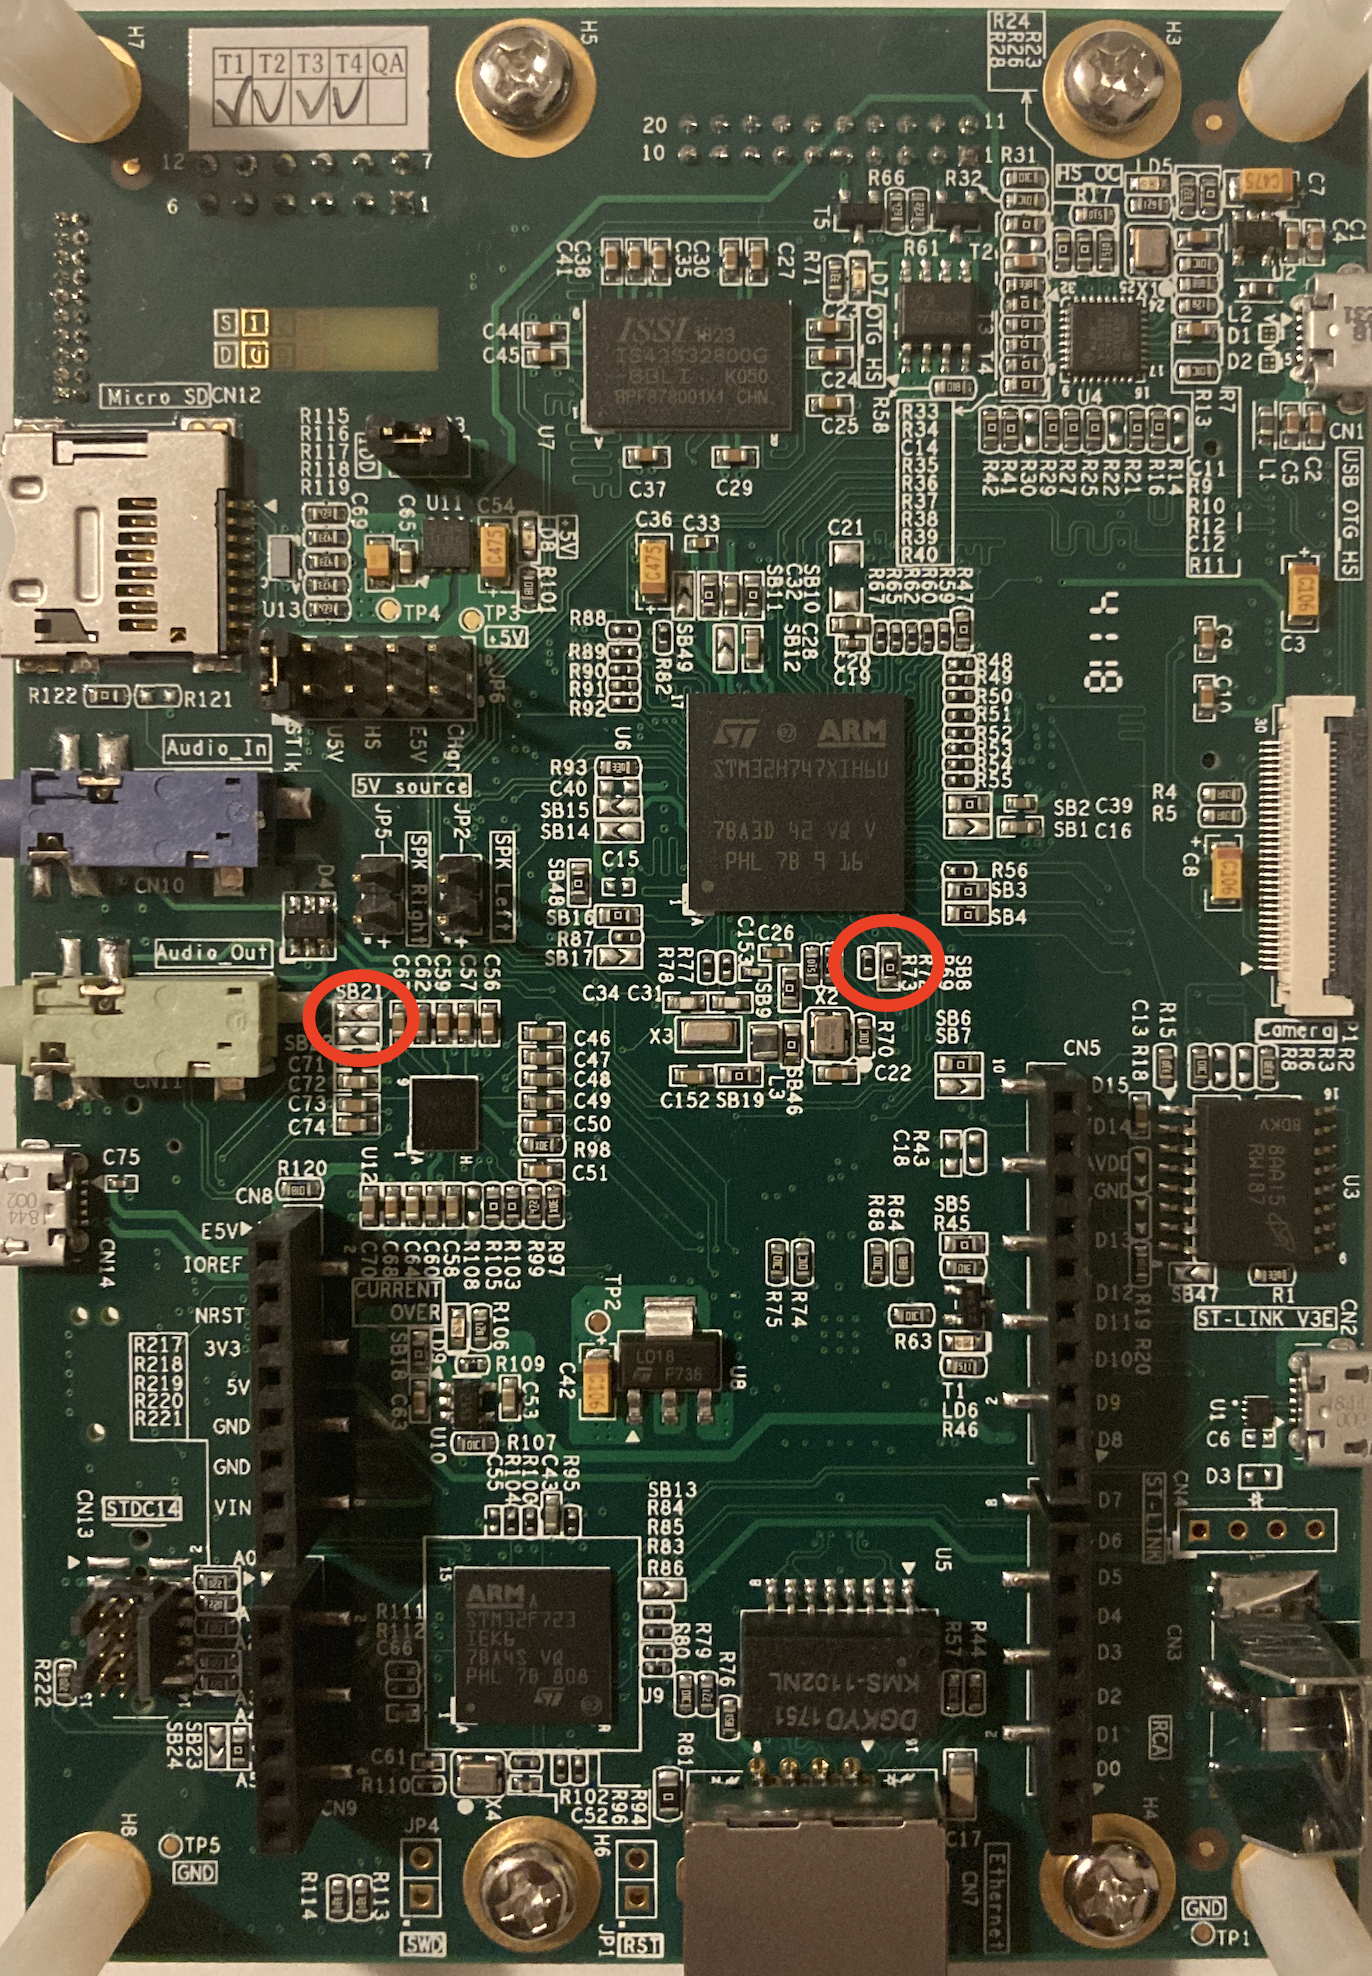
Here we can see that the setting required to make the ETH signals not interfere with the microphone signals is SB8 closed, SB21 open. Take a look at the image to see exactly where those bridges are found in the STM32H747I-DISCO board.
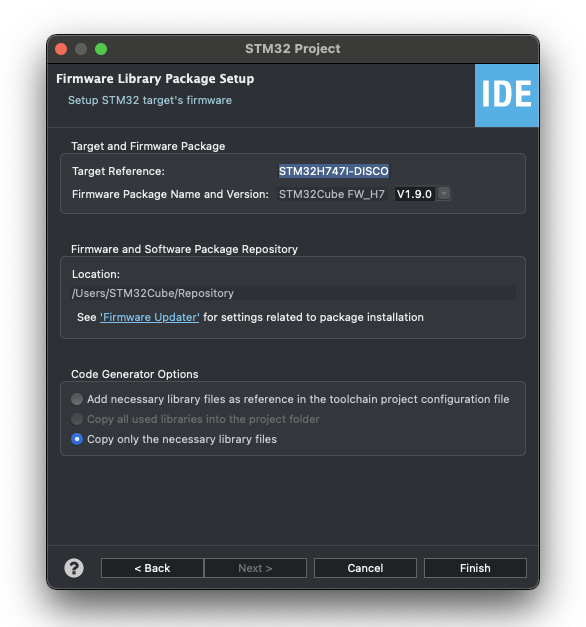
Make sure you have the latest version of the STM32Cube firmware for the H7 chips (here the V1.9.0 was used).
Make sure you follow the steps in this guide provided by the STM community to correctly configure the Ethernet and LwIP stack. Pay particular attention to the section regarding linkerscript modification!
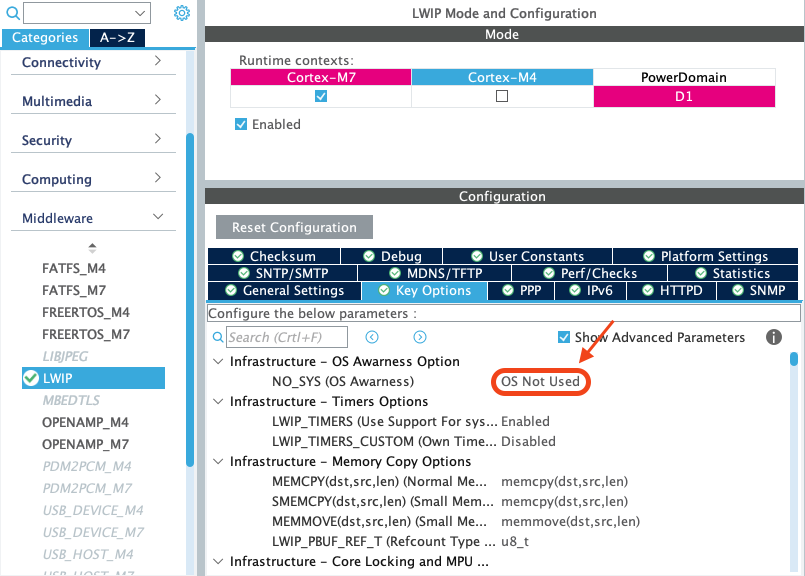
If you have finished the previous configurations, you are probably wondering how to set this without an OS.
Carry on as it is according to the ST guide.
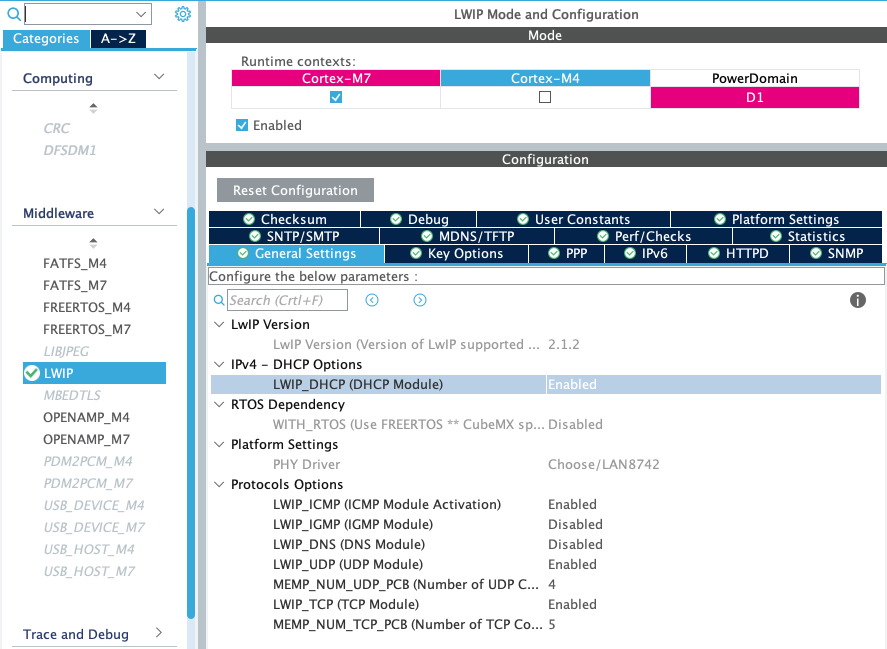
First, be sure that you have configured LwIP in the CubeMx without an OS as:
Add the LwIP checking process into your while(1) function of your main file (or the place where you are checking processes):
I also recommend commenting these lines in the Error_Handler function in the main file and modifying them later (sometimes it is good at the beginning to get started quickly instead of losing time finding starting errors).
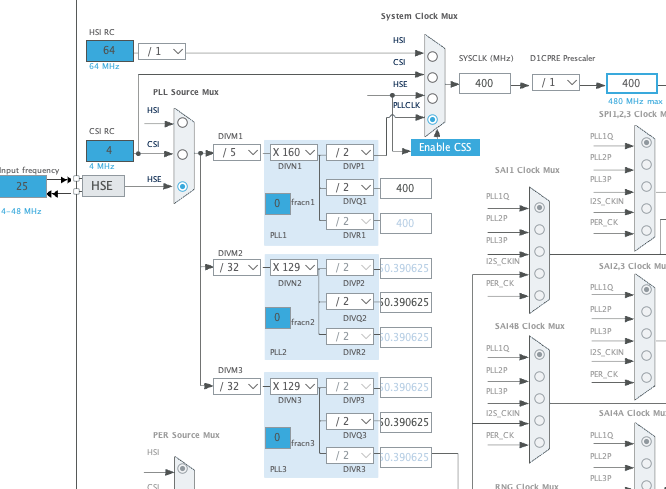
The final step is recheck that the clock configuration is correct as follows:
Now you have compiled the code correctly, you should be able to ping the device and receive UDP messages! On Linux you can do:
netcat –ul <port>
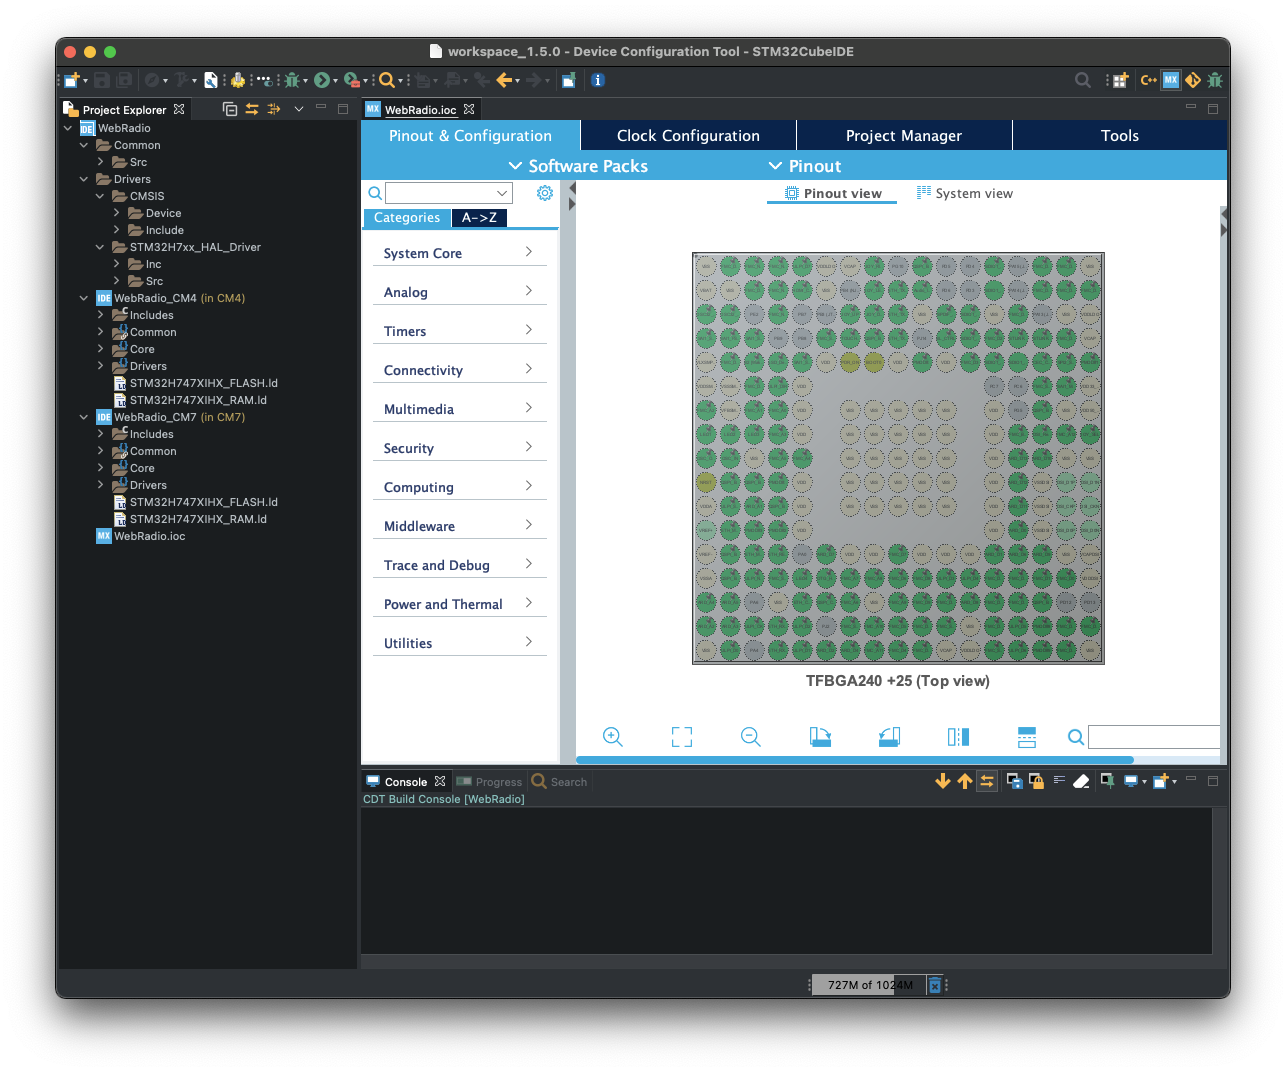
Here we will look in more depth at how the STM32CubeIDE structures the project. If you have been following this guide, you will probably have a filesystem like this:
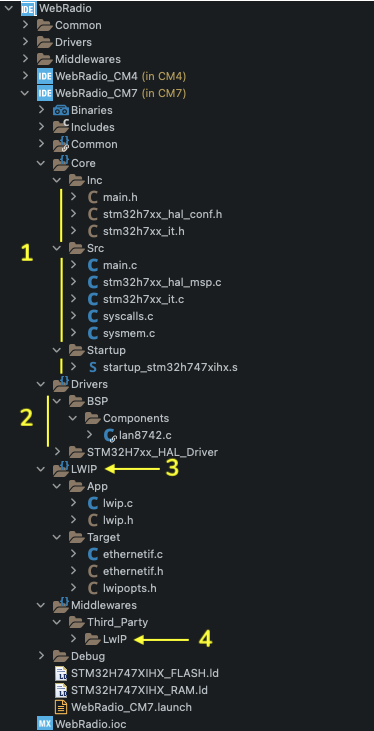
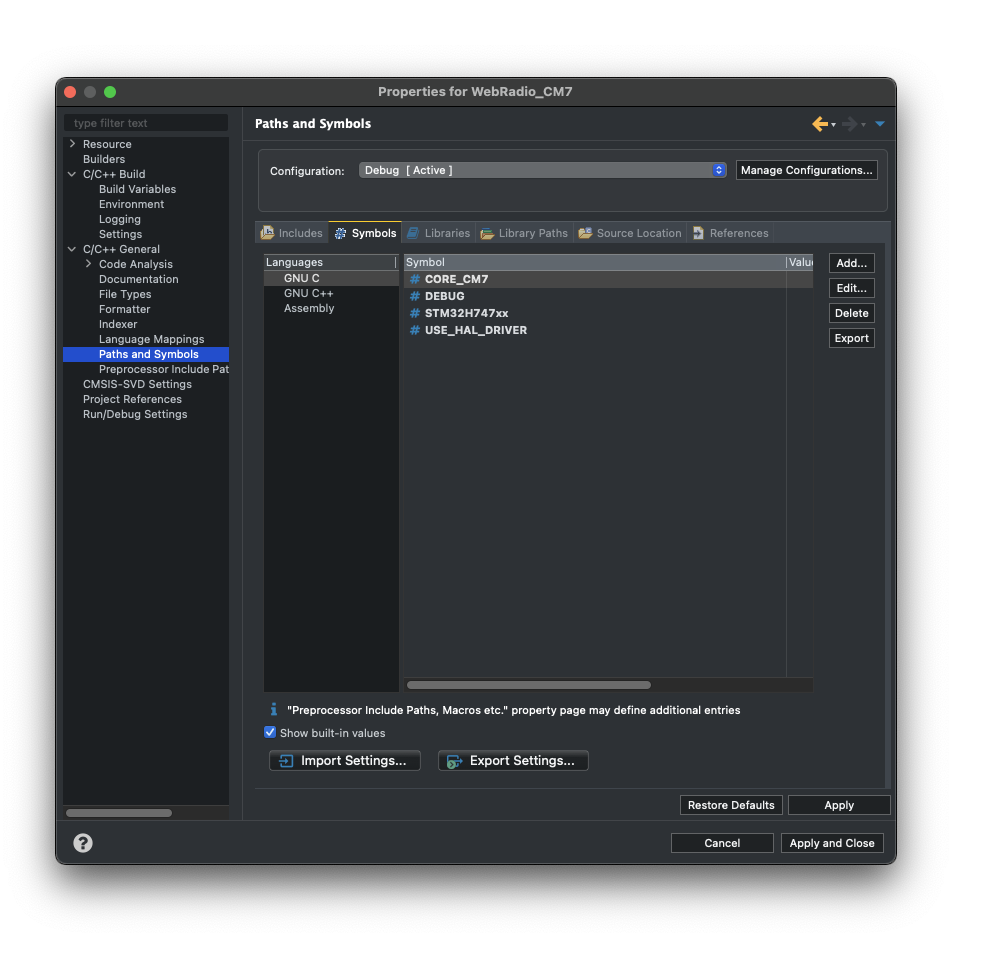
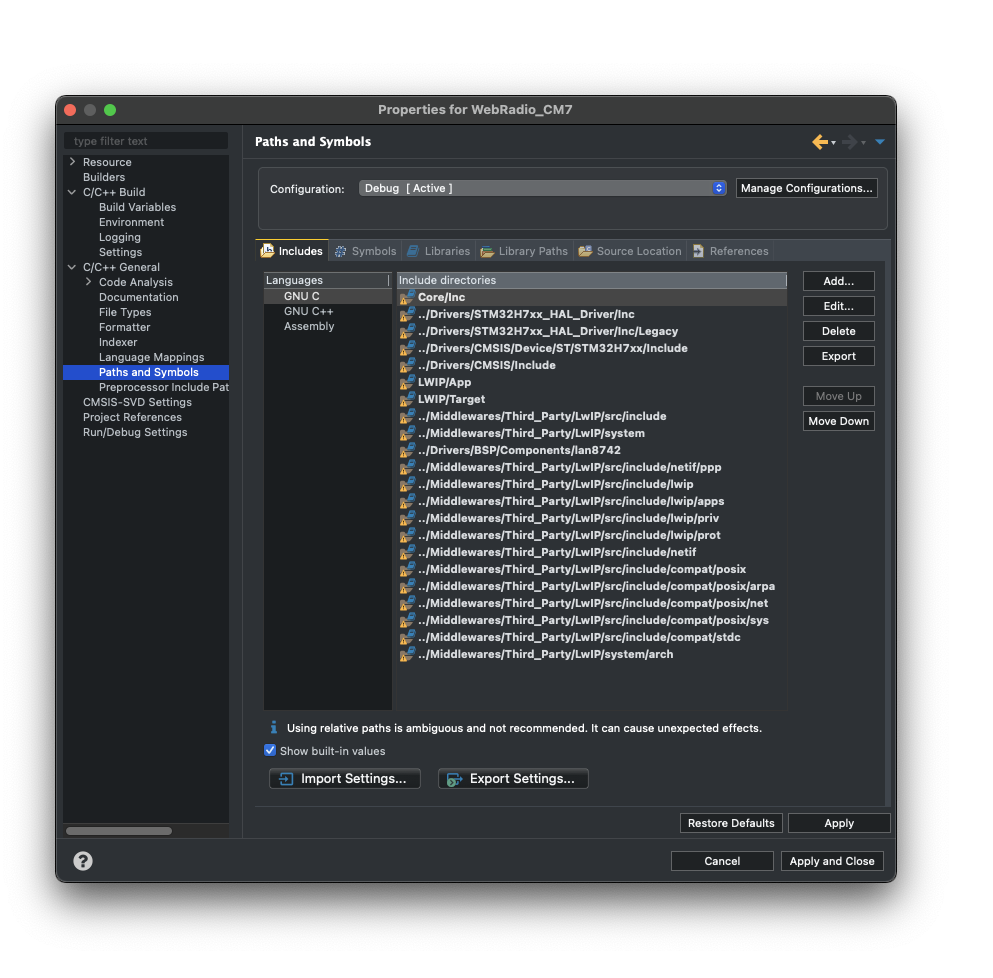
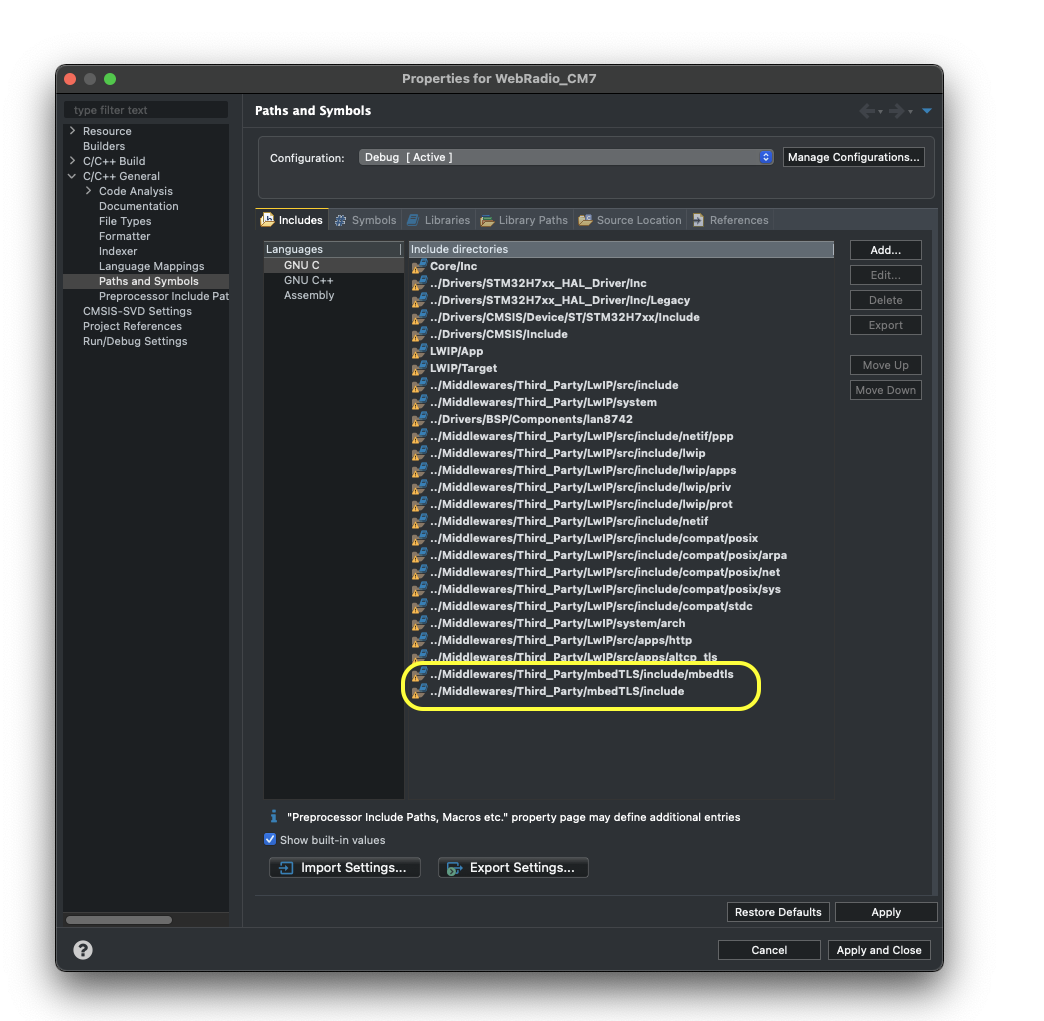
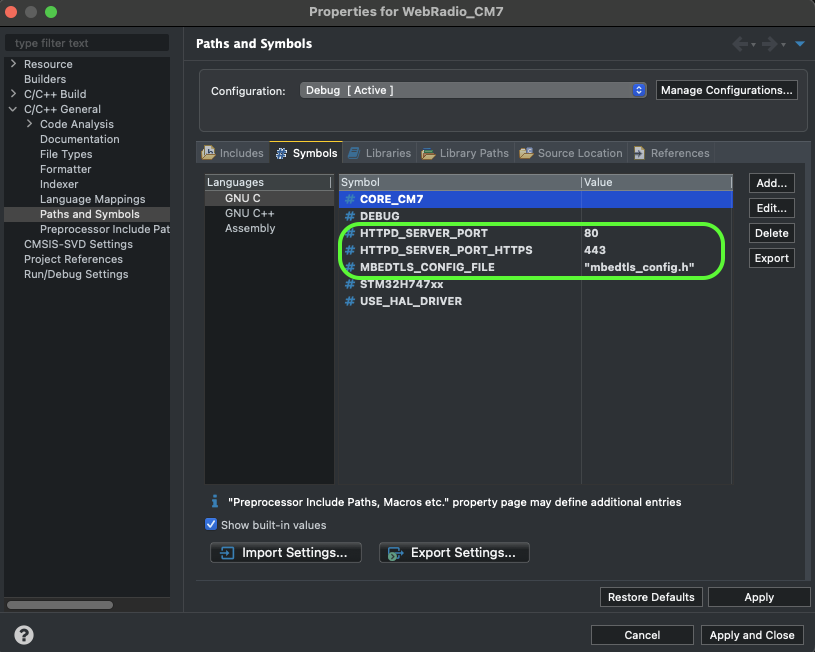
WebRadio.ioc).Another two important things to pay attention to are the include (where the libraries and drivers are included) and the symbols (for preprocessing) of the project. You can access them by right clicking on WebRadio_CM7 > Properties. Throughout this guide, we are going to modify some parameters there to make our project functional, so keep an eye on it.
Now let's create an HTTP server!
First, go to the LwIP middleware tab in the CubeMx and enable HTTP:
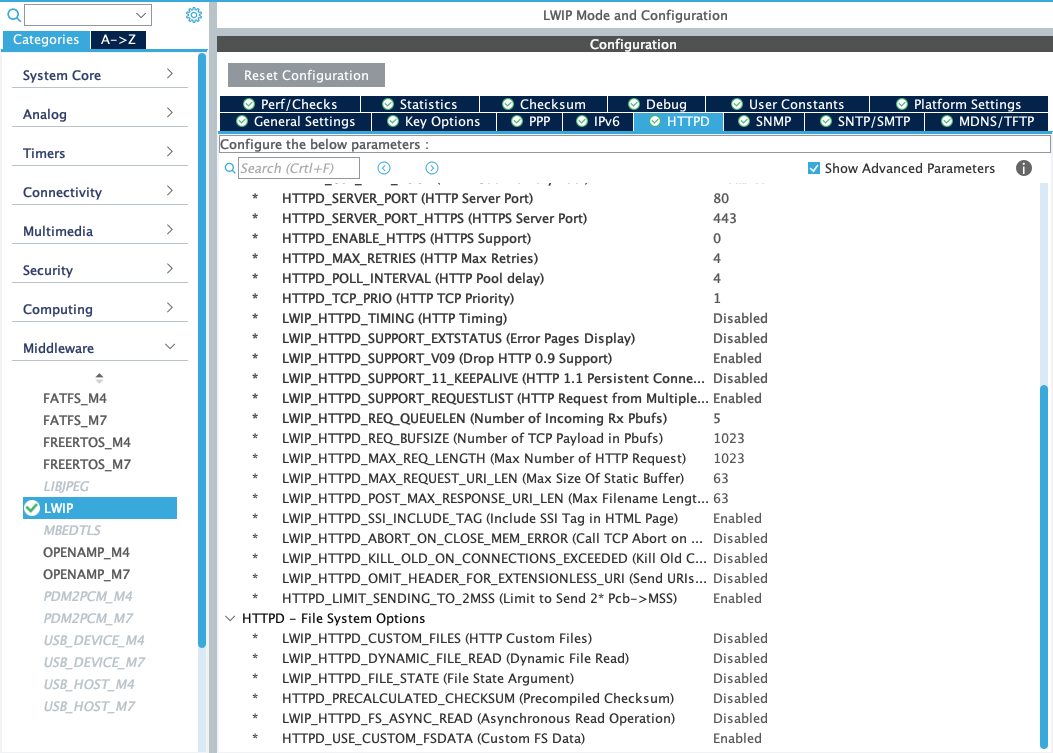
../../Middlewares/Third_Party/LwIP/src/include/lwip/apps/httpd_opts.h:386:27: fatal error: fsdata_custom.c: No such file or directory
386 | #define HTTPD_FSDATA_FILE "fsdata_custom.c"
    |                           ^~~~~~~~~~~~~~~~~
compilation terminated.

Next add httpd_init(); before the while(1) function of your main file which initializes the HTTP sever:
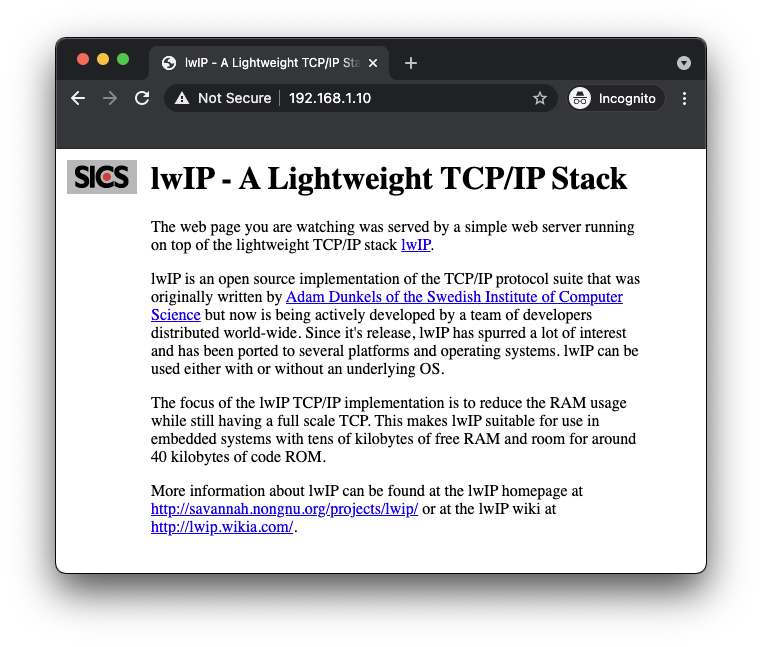
If you now open a browser and enter the static IP we have configured: http://192.168.1.10/ the following result should appear:
Now let's add a TLS layer to our HTTP server. First, go to the middleware tab in the CubeMx and configure the following parameters:
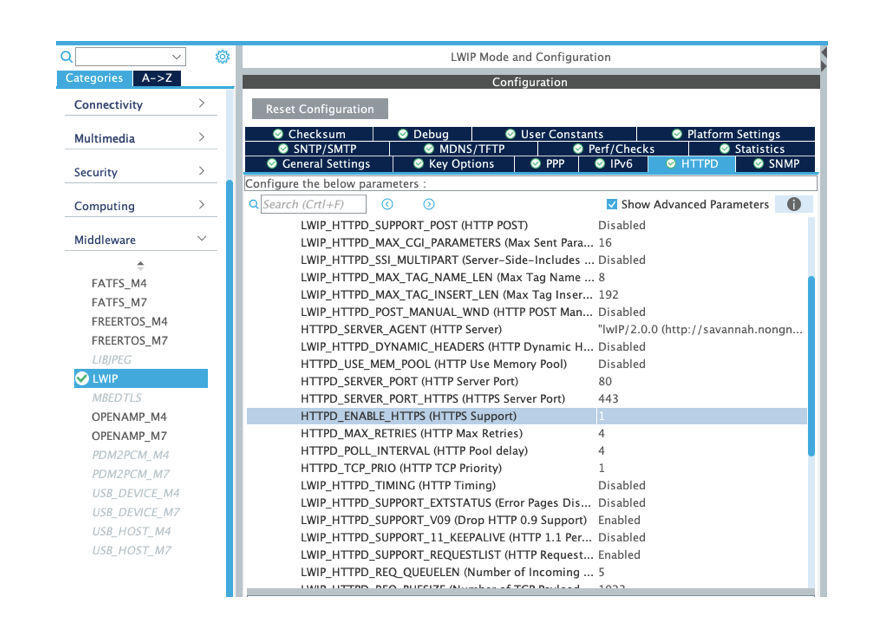
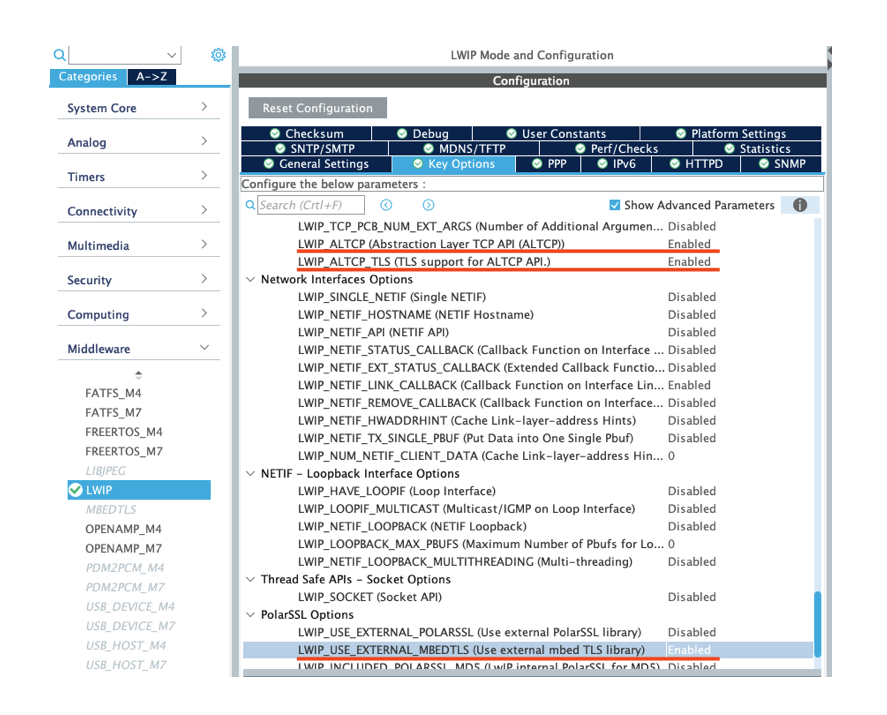
Enabling LWIP_ALTCP allows us to have an abstraction layer that links against a layer over the typical TCP. This option in conjunction with LWIP_ALTCP_TLS allows us to have support for SSL/TLS. Thus, the next thing we would need is set up the respective functions that link the tcp callbacks to the TLS layer protocol.
CubeMx only allows the MBEDTLS library to be added for the same Cortex-M7 with the FREERTOS flags activated. Since we are configuring everything as a bare metal system, in this step we going to add the MBEDTLS library manually.
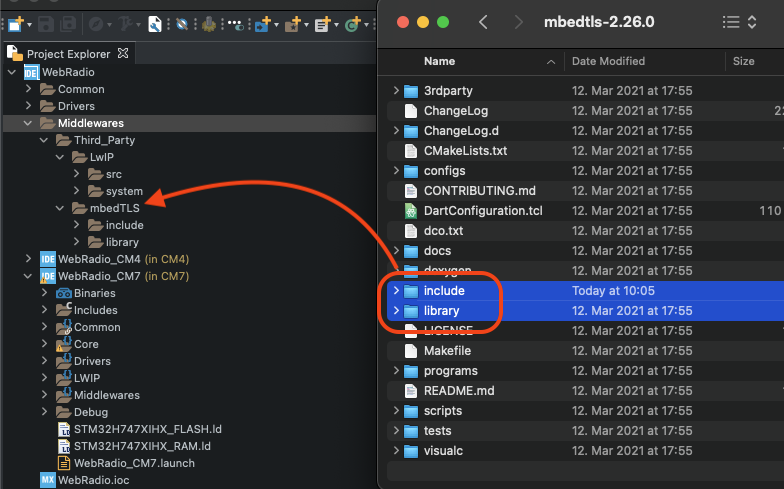
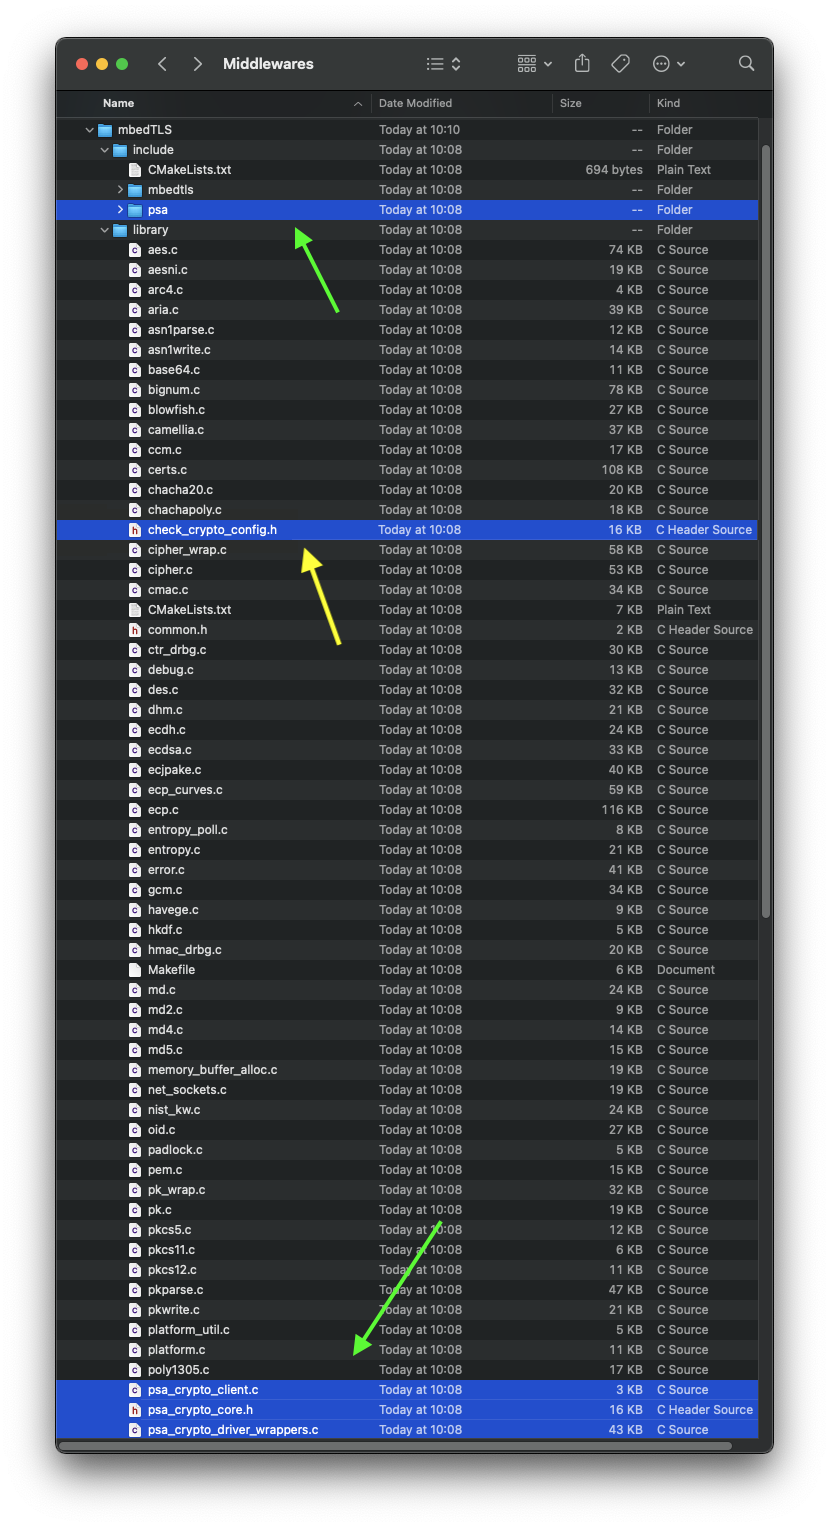
.c files in the Cortex-M7 project for the MBEDTLS library. To do this create a folder in the internal Middlewares folder called mbedTLS and simply drag and drop the files: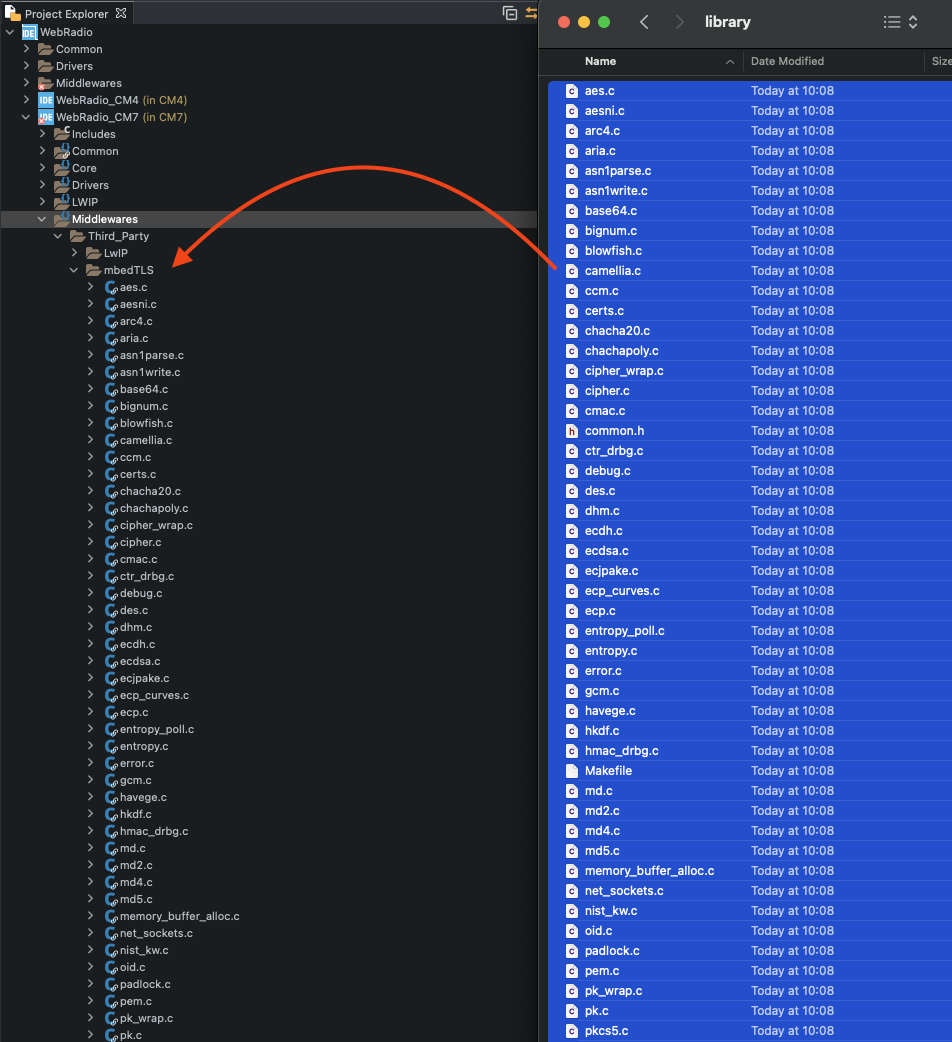
Inc folder: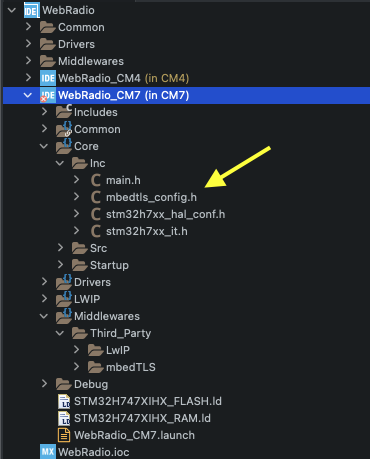
After these steps, you are able to compile the project without problems. Now we going to add some configurations to be able to add the TLS layer to our server.
There is a flag that has to be set but CubeMx does not provide a way of setting it so we have to do it manually.
To do this, first go to this folder:
./Middlewares/Third_Party/LwIP/src/include/lwip/apps
Find this file: altcp_tls_mbedtls_opts.h and change LWIP_ALTCP_TLS_MBEDTLS to 1:
Normally this error is linked to the previous flag so setting LWIP_ALTCP_TLS_MBEDTLS to 1 solves this issue:
../Core/Src/main.c:160: undefined reference to `altcp_tls_create_config_server_privkey_cert'
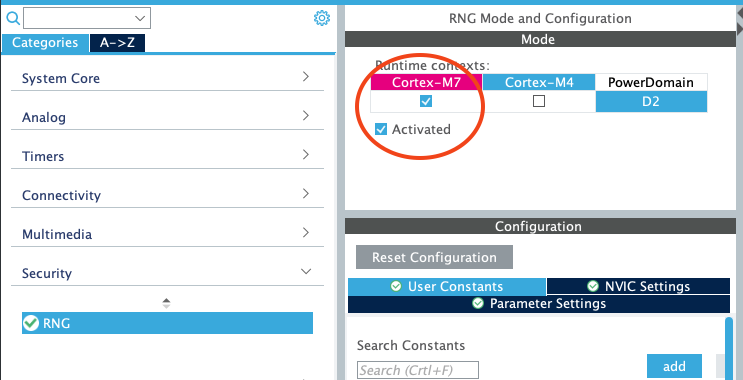
To use cryptography calculations for the TLS library, we going to use the random number generator configuration provided by the CubeMX. You can configure it in this tab:
Additionally we have to configure the Entropy poll callback for the RNG. Simply add the following file hardware_rng.c into the Src folder:
The previous function will allow us to access the HAL for the RNG.
Due to the computations of the TLS layer, we should increase the default RAM to 521Kb. To do this go the linkerscript called STM32H747XIHX_FLASH.ld and change the RAM to 512Kb:
In the same way, we increase the values of the buffer and the TCP segment size as follows (you can also do it in the CubeMx in the Middleware>LwIP>Key Options):
Connection to an HTTP server over TLS is based on established trust of the server. This trust is established by means of digital certificates provided by the server and signed by certificate authorities. For our purposes of testing a simple example, a self-signed certificate suffices (it will obviously not be recognized as secure but it is merely proof of concept).
MBEDTLS Library provides us with some sample certificates. To use them, simply add this library to the main file:
#include "mbedtls/certs.h"
The next step is to create our self-signed certificate and pass it to our server to set it up. MBEDTLS library provides us with handler functions to do this. altcp_tls_create_config_server_privkey_cert is one of them which creates a new TLS configuration.
We will do it as follows in our main file:
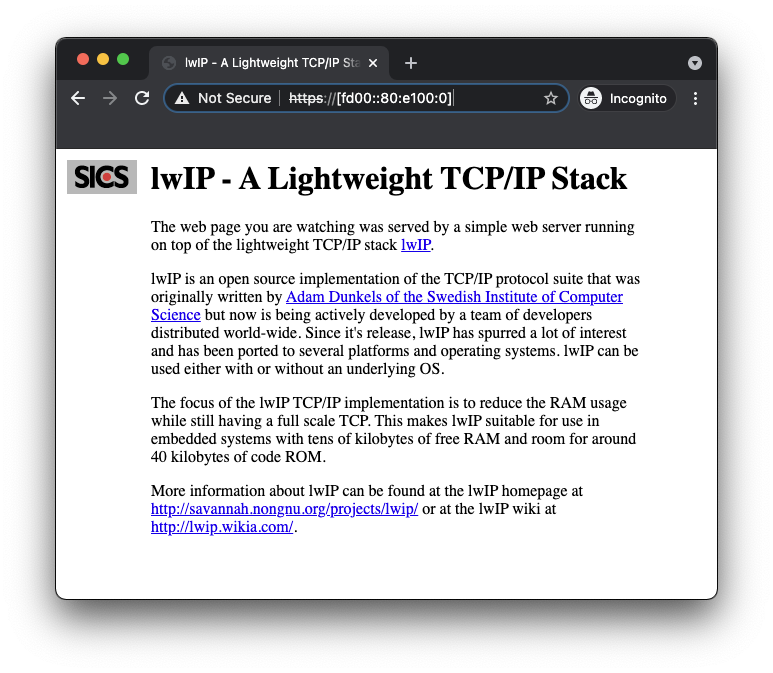
If you now use any web browser and try to access https://192.168.1.10/, then you will have a reply like this:

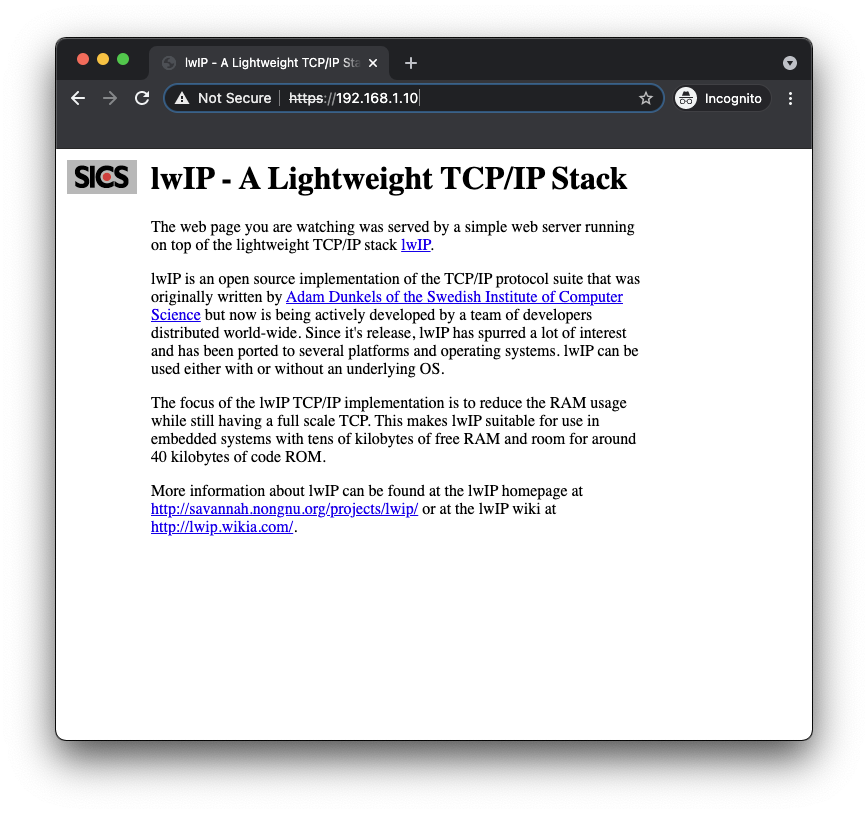
We have successfully created an HTTPS server!!
Notice that here, Chrome says that is insecure. This is expected because it is a self-signed certificate.
The next step is to configure the IPv6 of the HTTPS server. To achieve this and to simplify matters, it is preferable to set a DHCP server instead of a static IP.
Go to the LwIP setting at the Middleware section in CubeMx and simply enable DHCP:
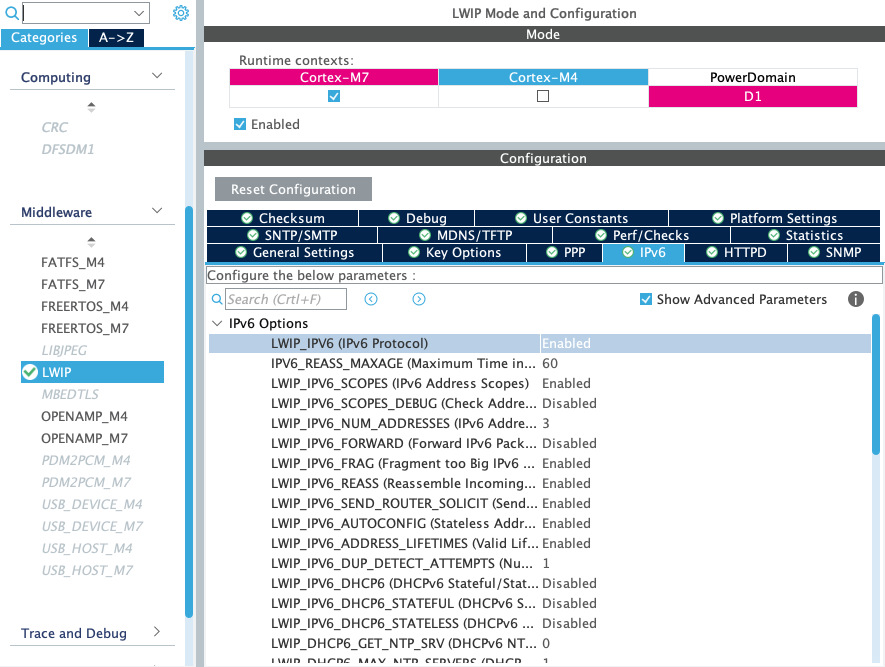
Then you can go to the IPv6 configuration and simply enable it also:
The final step – and the most difficult one to realize since STM32CubeMx does not provide any information in this regard – is to set the flag called NETIF_FLAG_MLD6 in the lower driver of the Ethernet peripheral (ethernetif.c file). This can be done as follows:
If this flag is not set, the multi-cast group of the device will not be joined and therefore no other external host can solicit the hardware address, i.e. the device cannot be accessed via IPv6.
Now let's modify the main to see which IP has been assigned to the device. To do this, change the main as follows:
struct netif used by LwIP to configure the ethernet peripheral (line 5).printf() (lines 8-15).Then go to the int main(void) and add the following lines before the while (1) loop to print the IPs that have been assigned to the device.
Finally, if you have been able to configure everything correctly, you should receive a message in the console similar to this one, depending on your router configuration. In my case this is:
IPv4 -> : 192.168.1.10
IPv6 -> : FD00::80:E100:0
Now we are able to access the device via those IPs!!